Adapted from Aunt Sammy’s Radio Recipes Revised (1931) & Any one can Bake published by the Royal Baking Powder Co. (1929)
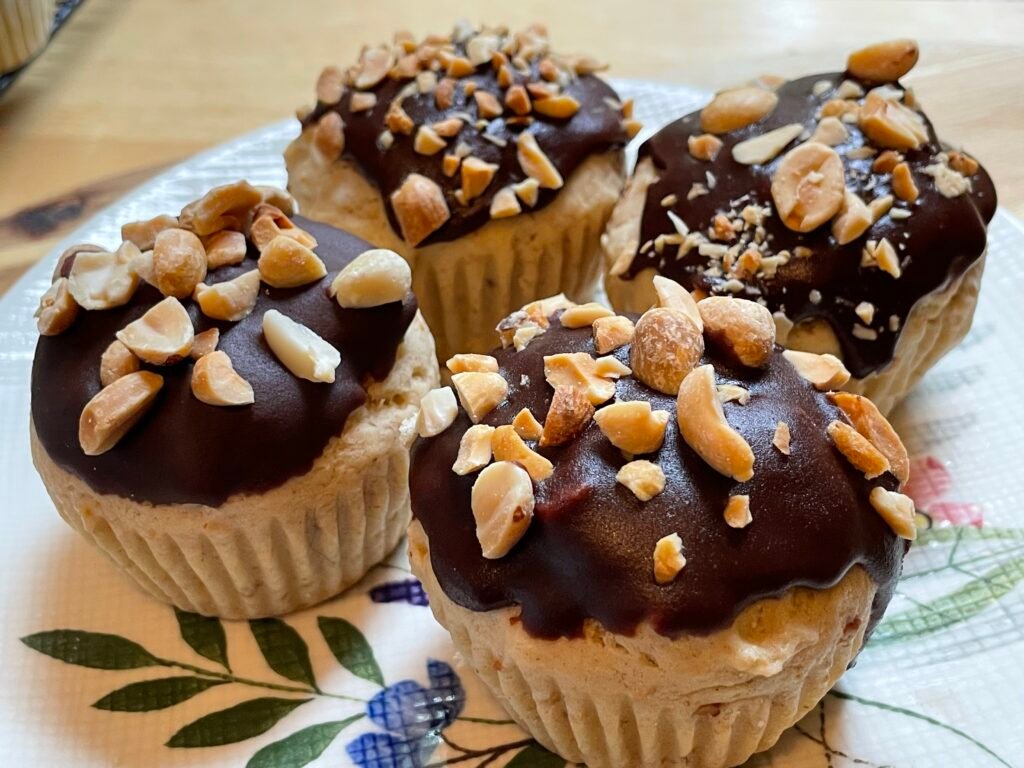
Vintage baking isn’t always pretty. This is what it took to get a 1920s icing to play nice with a 1930s cupcake — a lot of trial and error, but after plenty of testing, I finally landed it.
The Cupcakes
These peanut butter cupcakes come from Aunt Sammy’s Radio Recipes, a cookbook from the 1930s. On the first try, they came out a little dry — extra milk fixed the crumb right up. But I wanted more peanut flavor, so I added chopped peanuts, and that made a huge difference.
One thing to note, the batter is quite thick and that’s how it should be. I used an ice cream scoop to portion it out, filling the liners about ¾ full.
The Frosting
The Minute Fudge Frosting? No notes. This recipe comes from Any one can Bake, published by the Royal Baking Powder Co. in 1929, submitted by a Mrs. Wetmore — and she got it exactly right. It’s like old-fashioned fudge hugging the top of these cupcakes.
This fudge frosting has the subtle graininess that’s part of its classic character. It’s the same texture found in fudge that home cooks made decades ago, or the kind sold in old candy shops. I’ve shared some techniques to help minimize the graininess, but it can take some finesse – and I was only able to achieve a smooth, crystal-free batch a handful of times myself! Truth be told, even if it crystallizes a bit, it still looks and tastes fantastic — and my guess is that’s actually close to the authentic version!
Once the frosting is made on the stove top, you gently dip the cooled cupcakes in, garnish with peanuts, and let everything set fully.
I couldn’t resist taking it one step further — adding a chocolate fudge center. I suggest you try it too. It only takes a few extra minutes and brings the cupcakes to new heights. Just make a 1.5x batch of frosting, and you’re good to go.
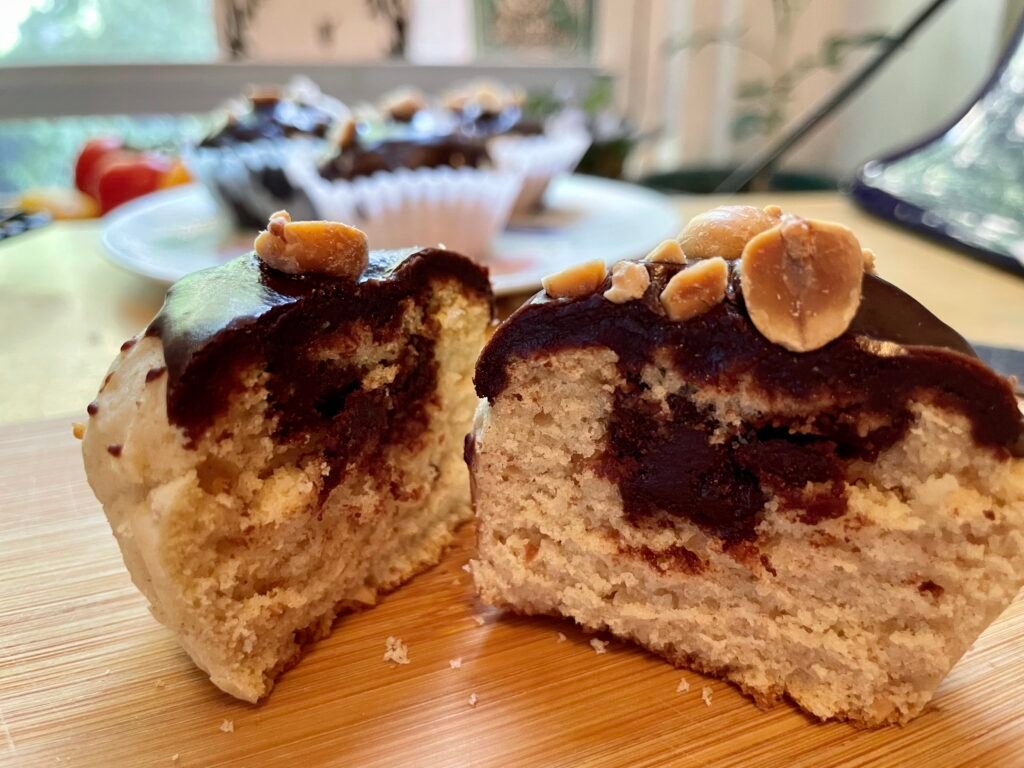
The Finished Product
The cupcakes are tender and lightly sweet with a hint of peanuts, and the frosting sits on top like a thick blanket of homemade chocolate fudge. This marriage of centuries is a perfect pairing.
Drop a comment below if you made this recipe – I’d love to know!
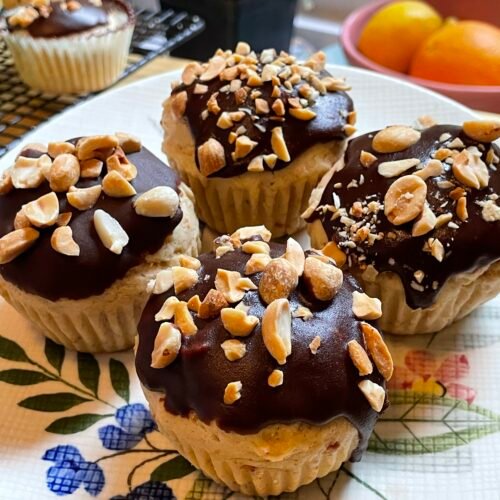
Peanut Butter Cupcakes
Ingredients
- ½ cup salted butter, softened
- ½ cup salted peanut butter (regular processed; I used Jif)
- ⅔ cup granulated sugar
- ⅓ cup brown sugar
- 2 eggs, lightly beaten `
- 1 teaspoon vanilla
- 3 cups all purpose flour
- 4 teaspoons baking powder
- ½ teaspoon salt
- 1 ¼ cup milk
- ⅓ cup finely chopped peanuts (for the batter)
Garnish
- 1/2 cup roughly chopped peanuts
Frosting
- Chocolate frosting of your choice; try the Minute Fudge Frosting on our website
Instructions
- Preheat oven to 350°F.
- Line standard muffin tins with paper liners (24 cupcakes total).
- Whisk together the flour, baking powder, and salt and set aside.
- Cream the butter, peanut butter, brown sugar, and granulated sugar together until light and fluffy.
- Add the beaten eggs gradually, mixing well after each addition.
- Add the vanilla and mix until incorporated.
- Add the flour and milk alternately in three additions, beginning and ending with the flour. Mix just until the batter is smooth; do not overmix.
- Fold in the chopped peanuts.
- Divide the batter evenly among the prepared muffin cups, filling each about two-thirds full. Note that the batter will be quite thick; this is how it should be.
- Bake for 15-17 minutes, or until the tops spring back lightly when touched and a toothpick inserted in the center comes out clean. Watch carefully over the last few minutes, as these are quick to overbake.
- Remove cupcakes from the pan right away to prevent the residual heat from overbaking them, and transfer to a wire rack to cool completely.
- Frost with Minute Fudge Frosting, or the chocolate frosting of your choice.
- To frost with Minute Fudge Frosting: Dip each cupcake top in the frosting, then immediately top with chopped peanuts. Let set completely. For a thicker layer of fudgy frosting, make a 1.5x batch.
- To add a fudgy center: Make a 1.5x batch of Minute Fudge Frosting. Use a knife to carve a cone-shaped hole in the top of each cupcake, reserving the cutout. Fill the hole with frosting, then replace the cutout on top. Let set, then dip the top in the remaining frosting to cover and garnish with chopped peanuts. Let set completely.
Notes
Mrs. Wetmore’s Minute Fudge Frosting
Ingredients
- ½ cup cocoa
- ¼ cup milk
- 4 tablespoons salted butter, cut into pieces
- 1 cup sugar
- ⅛ teaspoon salt
- 1 teaspoon vanilla extract
Optional
- Garnish of your choice (sprinkles, nuts, etc.)
Instructions
- Before you begin, see the tips section of this recipe for suggestions on how to prevent your icing from developing crystals. If it does crystalize a little, that's OK! It will still look and taste great – it will just be a little bit grainier, like an old fashioned fudge.
- Put the cocoa, milk, butter, sugar, and salt in a medium saucepan.
- Cook slowly over very low heat, stirring gently until the butter is melted and the mixture looks smooth and glossy.
- This may take a little longer than feels necessary—you’re waiting for the sugar to dissolve, not just for the butter to melt.
- A good visual cue: before boiling, the mixture should look like a smooth chocolate sauce. If you can see tiny sparkly grains along the bottom or sides of the pan, it isn’t ready yet.
- To test for this, you can rub a little syrup between your fingers (carefully, once cooled slightly)—it should feel completely smooth, not sandy.
- Then bring it to a boil and set a timer for one minute. Cook without stirring for exactly one minute (per the original recipe).
- Remove from heat and stir in the vanilla.
- Beat immediately with a spatula or wooden spoon until the frosting begins to thicken. The consistency should be like a thick chocolate sauce—still loose enough to dip the cupcake tops, but thick enough to cling to the surface.
- Dip the tops of your cupcakes into the frosting.
- If the frosting hardens too fast while icing the cakes, moisten it with hot water to loosen it up.
- If you are garnishing the cupcake tops (sprinkles, nuts, etc.) do so immediately.
- The frosting will continue to set and become firm as it cools on the cupcakes.